ASP.NET MVC - Views
To learn ASP.NET MVC, we are Building an Internet Application.
Part V: Adding Views for Displaying the Application.
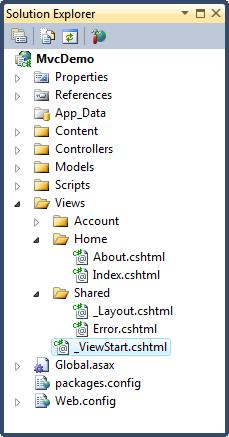
The Views Folder
The Views folder stores the files (HTML files) related to the display of the application (the user interfaces). These files may have the extensions html, asp, aspx, cshtml, and vbhtml, depending on the language content.
The Views folder contains one folder for each controller.
Visual Web Developer has created an Account folder, a Home folder, and a Shared folder (inside the Views folder).
The Account folder contains pages for registering and logging in to user accounts.
The Home folder stores application pages like the index page (home page) and the about page.
The Shared folder is used to store views shared between controllers (master pages and layout pages).

ASP.NET File Types
The following HTML file types can be found in the Views Folder:
| File Type | Extention |
|---|---|
| Plain HTML | .htm or .html |
| Classic ASP | .asp |
| Classic ASP.NET | .aspx |
| ASP.NET Razor C# | .cshtml |
| ASP.NET Razor VB | .vbhtml |
The Index File
The file Index.cshtml represents the Home page of the application. It is the application's default file (index file).
Put the following content in the file:
@{ViewBag.Title = "Home Page";}
<h1>Welcome to
W3Schools</h1>
<p>Put Home Page content here</p>
The About File
The file About.cshtml represent the About page of the application.
Put the following content in the file:
@{ViewBag.Title = "About Us";}
<h1>About Us</h1>
<p>Put About Us content here</p>
Run the Application
Select Debug, Start Debugging (or F5) from the Visual Web Developer menu.
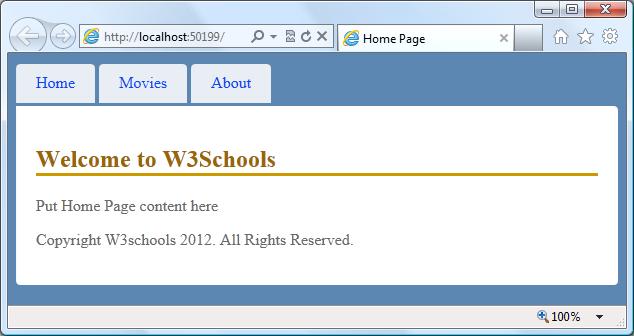
Your application will look like this:

Click on the "Home" tab and the "About" tab to see how it works.
Congratulations
Congratulations. You have created your first MVC Application.
Note: You cannot click on the "Movies" tab yet. We will add code for the "Movies" tab in the next chapters of this tutorial.

